
유튜브에서 스프링시큐리티를 심화교육하면서 조금더 레벨업 하고자 한다.
IDE : IntelliJ
언어 : Java 8
스프링부트 버전 : 2.7.13
DB : MySQL
빌드관리 도구 : Maven
OS : iOS
참고유튜브 : 메타코딩
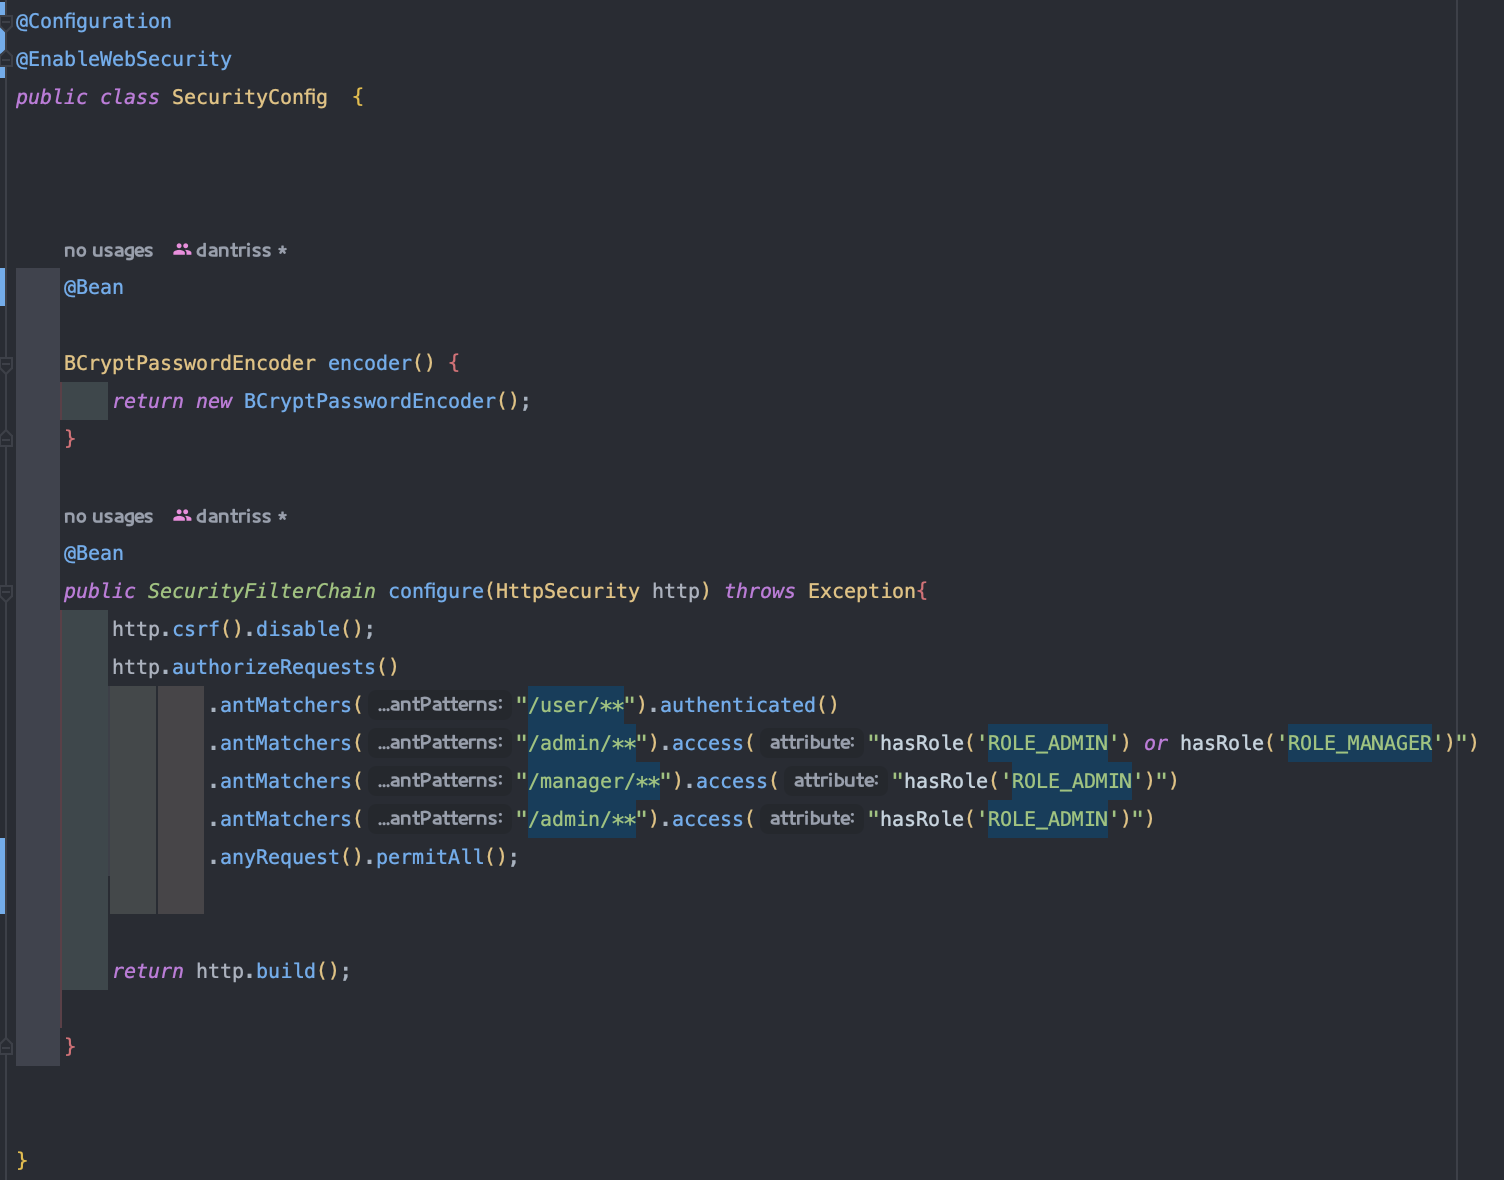
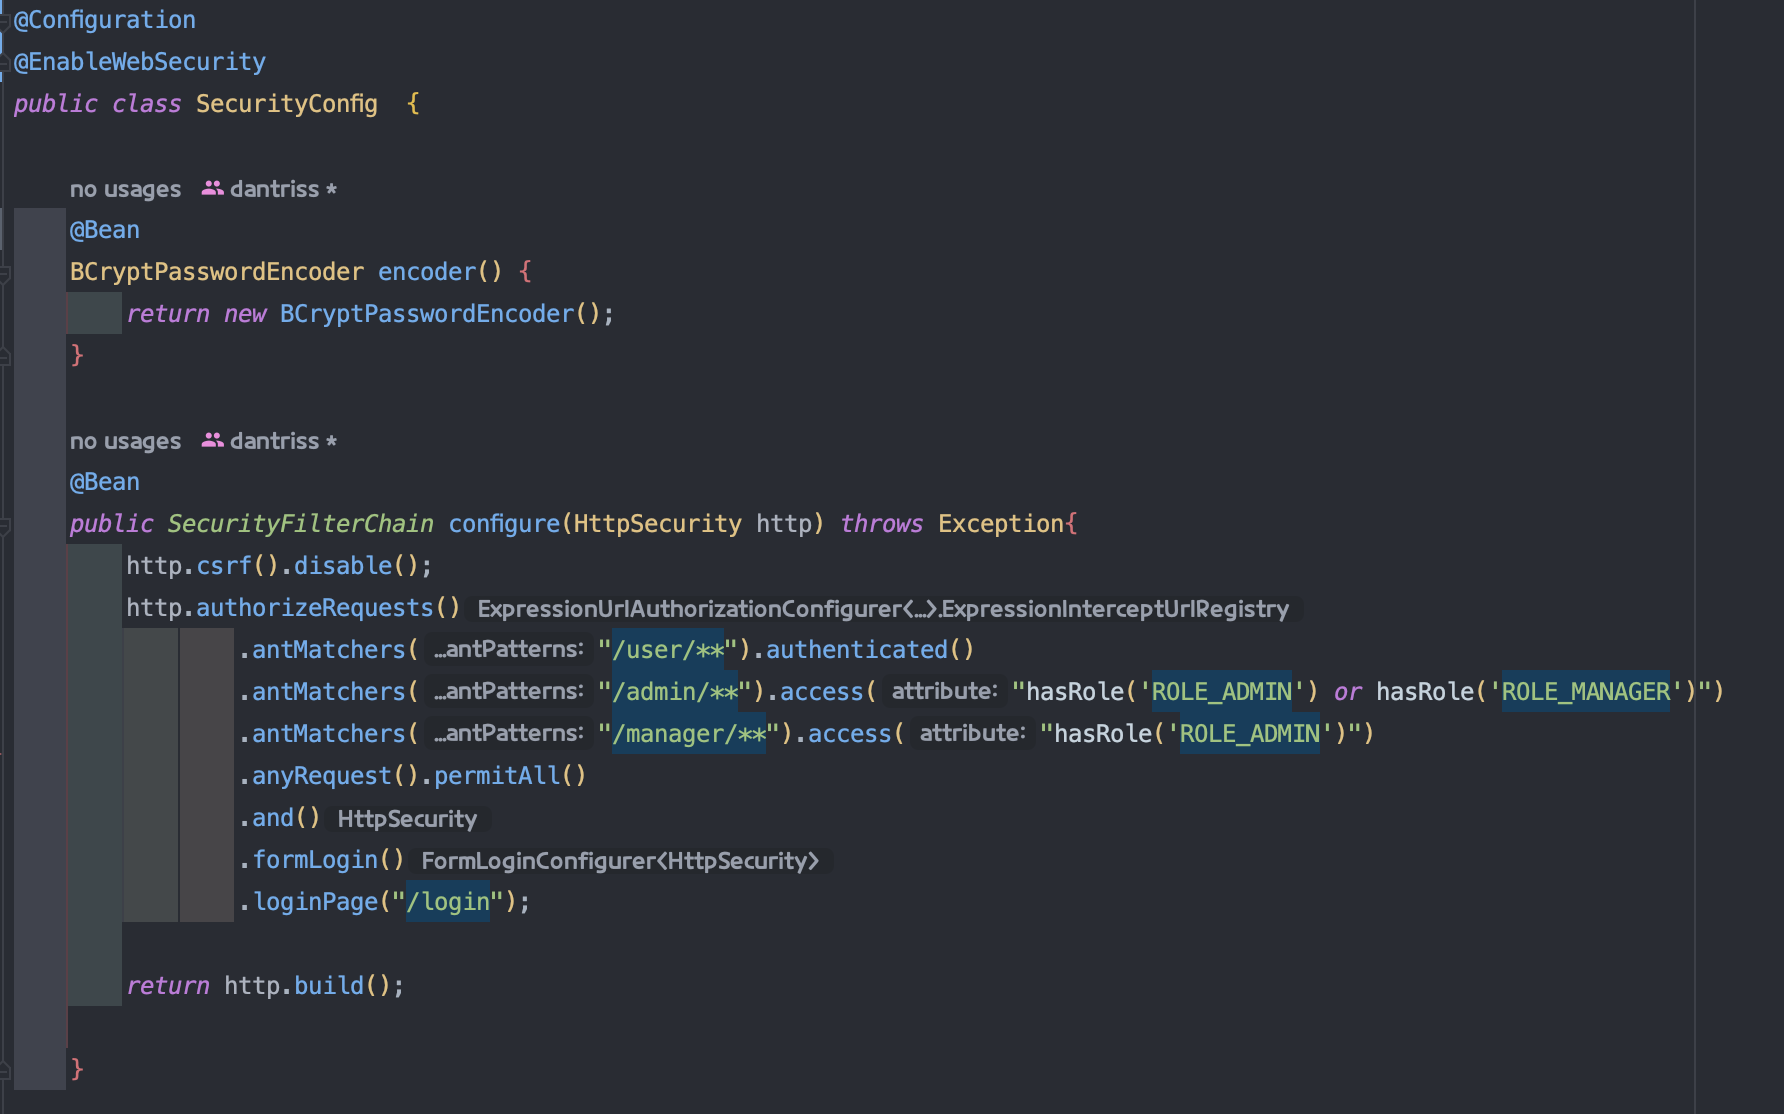
가진 권한에 따라서 접속할 수 있는 url에 차별점을 주기위해서 SecurityConfg파일을 생성해준다.
url주소에 /admin이 있다면 admin이나 manager 권한이 있는 사용자만 접근이 가능하고
/user, /admin, /manager가 없다면 권한이 없더라도 접근이 가능하게 permitAll을 작성해주고
비밀번호 해시화를 위해서 BcryptPasswordEncoder를 빈으로 등록해준다.
@Configuration
@EnableWebSecurity
public class SecurityConfig  {

    @Bean

    BCryptPasswordEncoder encoder() {
        return new BCryptPasswordEncoder();
    }

    @Bean
    public SecurityFilterChain configure(HttpSecurity http) throws Exception{
        http.csrf().disable();
        http.authorizeRequests()
                .antMatchers("/user/**").authenticated()
                .antMatchers("/admin/**").access("hasRole('ROLE_ADMIN') or hasRole('ROLE_MANAGER')")
                .antMatchers("/manager/**").access("hasRole('ROLE_ADMIN')")
                .antMatchers("/admin/**").access("hasRole('ROLE_ADMIN')")
                .anyRequest().permitAll();

        return http.build();

    }
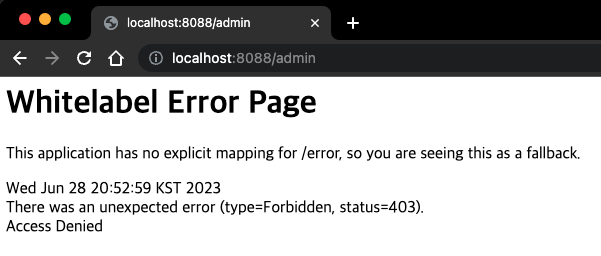
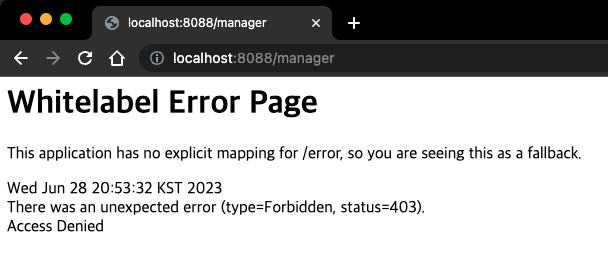
테스트를 위해서 indexController에 getmapping으로 각각 admin,manager,모든사용자 들이 접근가능하도록 작성해준뒤 서버를 실행한 후에 테스트를 진행해보자 @ResponseBody를 추가해서 만약 admin권한을 가지고 있다면 admin이 출력이 될 것이다.
그에 반해 loginForm으로 이동하게 된다면 모든 사용자가 접근이 가능할 것이다.
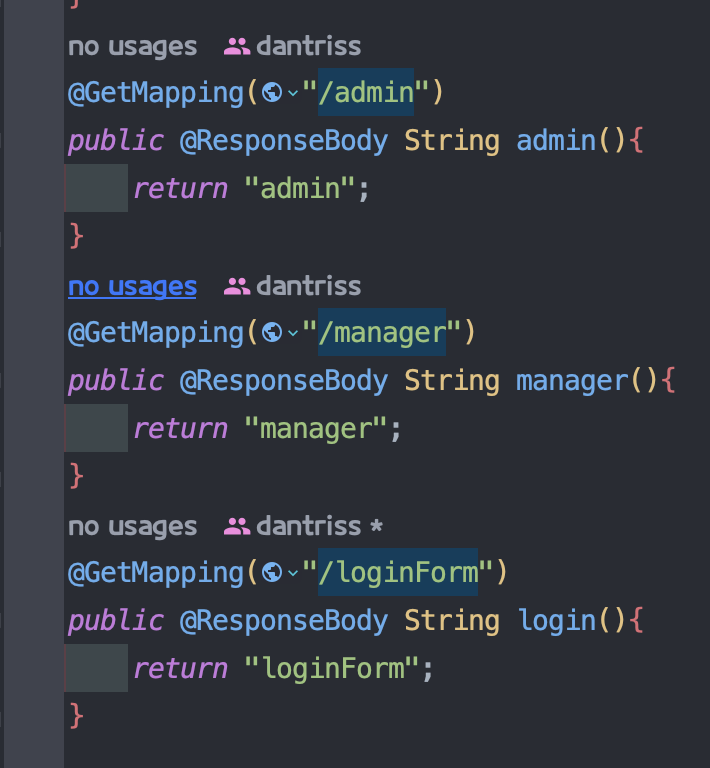
access denied가 뜨는 admin과 manager에 비해 /loginForm은 정상적으로 출력되는 모습을 확인 할 수 있다.
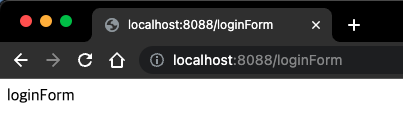
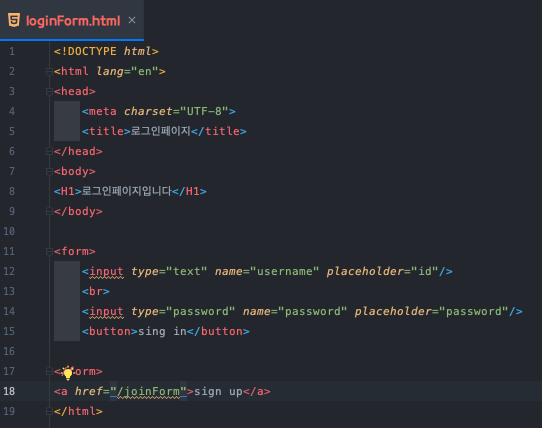
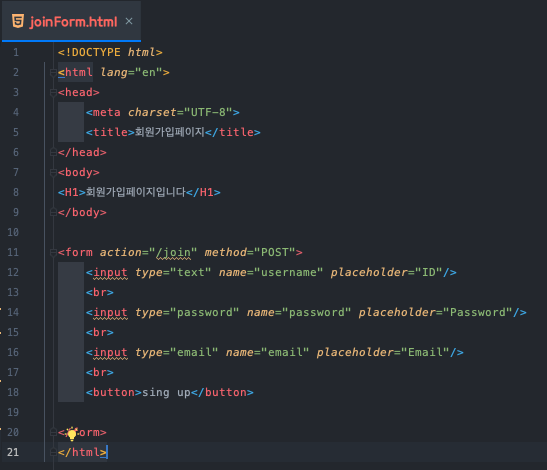
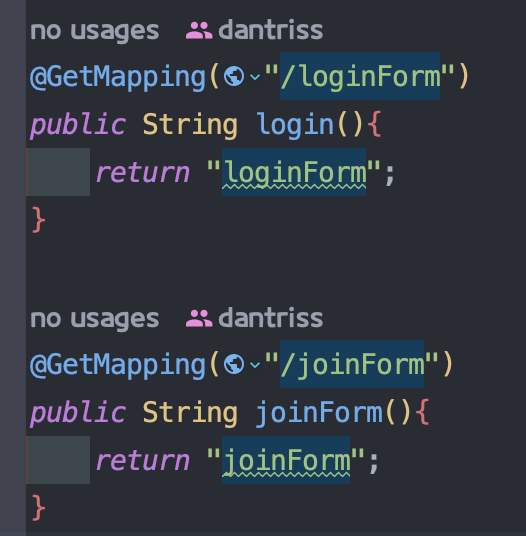
loginForm과 signForm에 접속하면 단순히 글자만 출력되게 하는게 아니라 html을 출력하기 위해서
templates에 joinForm과 loginForm을 생성해준다.

<!DOCTYPE html>
<html lang="en">
<head>
    <meta charset="UTF-8">
    <title>로그인페이지</title>
</head>
<body>
<H1>로그인페이지입니다</H1>
</body>

<form>
    <input type="text" name="username" placeholder="id"/>
    <br>
    <input type="password" name="password" placeholder="password"/>
    <button>sing in</button>

</form>
<a href="/joinForm">sign up</a>
</html>
<!DOCTYPE html>
<html lang="en">
<head>
    <meta charset="UTF-8">
    <title>회원가입페이지</title>
</head>
<body>
<H1>회원가입페이지입니다</H1>
</body>

<form action="/join" method="POST">
    <input type="text" name="username" placeholder="ID"/>
    <br>
    <input type="password" name="password" placeholder="Password"/>
    <br>
    <input type="email" name="email" placeholder="Email"/>
    <br>
    <button>sing up</button>

</form>
</html>
indexController에서 loginForm과 joinForm으로 받아서 각각 리턴해준다.
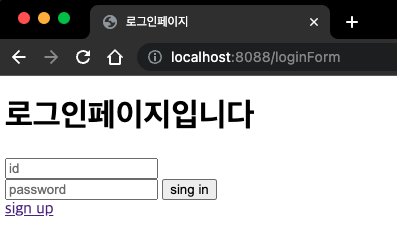
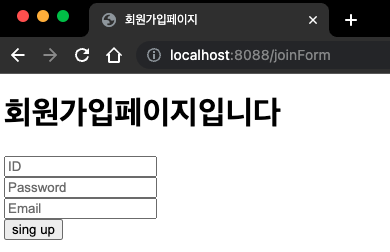
그 후 loginForm 과 joinForm으로 들어가서 확인해보면 아래와 같이 뜨는걸 확인할 수 있다.
db에 테이블을 넣기위해서 모델을 작성해준다 model 패키지에 user 클래스를 만들고 아래와 같이 작성해준다.

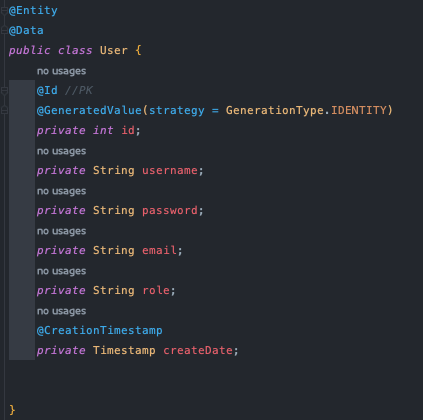
@Entity
@Data
public class User {
    @Id //PK
    @GeneratedValue(strategy = GenerationType.IDENTITY)
    private int id;
    private String username;
    private String password;
    private String email;
    private String role;
    @CreationTimestamp
    private Timestamp createDate;

}
db를 연결해서 스키마를 확인해보면 잘 들어가있는걸 확인할 수 있다.

회원가입을 할 때 데이터가 제대로 넘어오는지 확인해보자
위에서 joinForm에 form 태그에서 action으로 join으로 넘어가게 작성을 해주었기 때문에
indexController에서 회원가입을 눌렀을때 join으로 받아서 파라메터로 방금 작성한 User객체를 넣고 user를 출력해보자
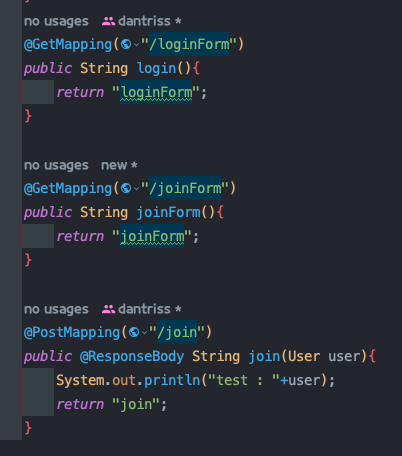
    @PostMapping("/join")
    public @ResponseBody String join(User user){
        System.out.println("test : "+user);
        return "join";
    }
회원가입 화면에서 입력한 값이 콘솔에 출력되는걸 확인할 수 있다.

이제 입력한 값들을 기본으로 정보를 db에 저장하기 위해서 Repository를 작성해보자

JpaRepository를 오버라이딩했기 때문에 간단한 CRUD함수들은 작성하지 않아도 된다.
또한 JpaRepository의 부모가 Repository를 오버라이딩 했기때문에 어노테이션을 추가하지 않아도 된다.

public interface UserRepository extends JpaRepository<User, Integer> {

}


IndexContoller에서 join 메서드를 아래와 같이 수정한다.
일반적으로 회원가입을 할때는 모든 사용자가 user권한을 주기위해 role에 user권한을 set.
비밀번호를 해쉬해서 저장하지 않으면 스프링시큐리티가 로그인을 해줄 수 없기 때문에 비밀번호를 해쉬해해서 db에 저장해준다.
회원가입을 했을 경우 로그인화면으로 바로 보내주기 위해 loginForm을 리다이렉트 리턴해준다.

@PostMapping("/join")
    public String join(User user){
        System.out.println("test : "+user);
        user.setRole("ROLE_USER");

        //비밀번호 해시화
        String rawPassword = user.getPassword();
        String endPassword = bCryptPasswordEncoder.encode(rawPassword);
        user.setPassword(endPassword);

        userRepository.save(user);
        return "redirect:/loginForm";
    }
securityConfig에서 로그인페이지를 loginForm으로 지정해준다.
    @Bean
    public SecurityFilterChain configure(HttpSecurity http) throws Exception{
        http.csrf().disable();
        http.authorizeRequests()
                .antMatchers("/user/**").authenticated()
                .antMatchers("/admin/**").access("hasRole('ROLE_ADMIN') or hasRole('ROLE_MANAGER')")
                .antMatchers("/manager/**").access("hasRole('ROLE_ADMIN')")
                .antMatchers("/admin/**").access("hasRole('ROLE_ADMIN')")
                .anyRequest().permitAll()
                .and()
                .formLogin()
                .loginPage("/loginForm");

        return http.build();

    }
서버를 실행해서 회원가입을 해보면 insert 쿼리가 활성화되고 db에 유저의 정보가 저장되는걸 확인할 수 있다.


'프로젝트 > SpringSecurity' 카테고리의 다른 글
| [Spring Security] 5. OAuth 구글로그인(2) (0) | 2023.07.04 |
|---|---|
| [Spring Security] 4. OAuth 구글로그인(1) (0) | 2023.07.04 |
| [Spring Security] 3. 권한부여&오류수정과정 (0) | 2023.07.04 |
| [Spring Security] 2. 로그인 (0) | 2023.06.29 |
| [Spring Security] 0. 환경설정 (0) | 2023.06.28 |


댓글