
유튜브에서 스프링시큐리티를 심화교육하면서 조금더 레벨업 하고자 한다.
IDE : IntelliJ
언어 : Java 8
스프링부트 버전 : 2.7.13
DB : MySQL
빌드관리 도구 : Maven
OS : iOS
참고유튜브 : 메타코딩
저번에 로그인을 구현하는 기능을 작성 한 후 토큰을 만들어서 클라이언트 측으로 응답해주는 기능을 작성해보자
JwtAuthenticationFilter에서 successfulAuthentication 을 오버라이딩 해준다 (ctrl+o)
/login으로 접속해보면 해당 메서드로 이동하는 것을 확인 할 수 있다.
@Override
protected void successfulAuthentication(HttpServletRequest request, HttpServletResponse response, FilterChain chain, Authentication authResult) throws IOException, ServletException {

    System.out.println("successfulAuthentication 실행됨(인증완료)");

    super.successfulAuthentication(request, response, chain, authResult);
}
해당 메서드에서 authResult 파라메터를 한번 출력해보면
저번시간에 강제로 로그인해서 세션에 저장된 유저의 정보가 들어가 있다.
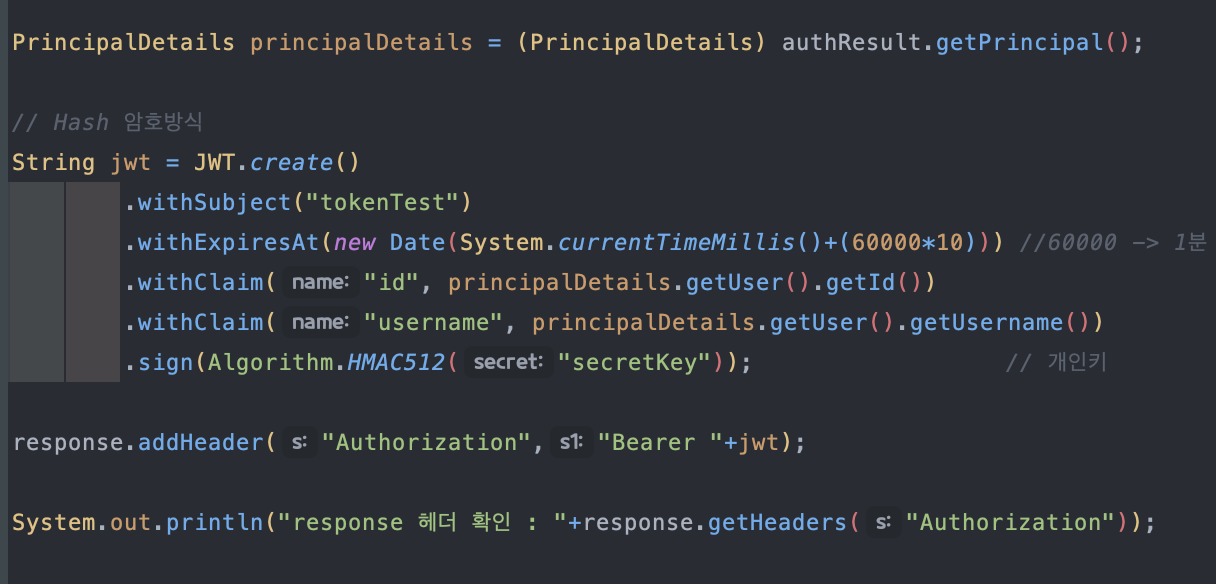
authResult에 있는 값들을 PrincipalDetails로 형변환 하여 principalDetails라는 변수명으로 값들을 저장한다.
그 후 builder 방식으로 토큰을 생성한다.
withSubject로 토큰의 이름을 설정해준 후
withExpiresAt으로 토큰의 유효시간을 설정해준다. 1/1000 초 기준으로 1000을 입력시 1초로 계산이 된다.
withClaim으로 유저의 고유번호와 유저아이디를 넣어준다.
마지막 sign으로 어떠한 알고리즘 방식을 사용하는지 작성해주고 개인키를 만들어준다.
이렇게 만든 토큰을 클라이언트에게 응답해주기위해 response header 부분에 add 나 set 을 해준다.
key 값으론 Authorization value 값으론 Bearer +만든 토큰(Bearer 뒤에 띄어쓰기를 넣어줘야한다.)
postman에서 /login으로 이동하면 원래라면 header 부분에 key 값으로 Authorization, value로 Bearer ~~~ 라고 뜨겠지만,
postman 설정이 잘못되었는지 아무리해도 뜨지 않았다.
하지만 콘솔에서 header에 Authorization이라는 이름을 출력해보면
토큰이 잘 만들어져 header부분에 있는것을 확인할 수 있다.
이제 해당 토큰이 다시 서버쪽으로 넘어왔을 때 유효한 토큰인지 확인하는 필터부분을 작성하면 된다.

@Override
protected void successfulAuthentication(HttpServletRequest request, HttpServletResponse response, FilterChain chain, Authentication authResult) throws IOException, ServletException {

    System.out.println("successfulAuthentication 실행됨(인증완료)");
    System.out.println("authresult test : "+authResult);


    PrincipalDetails principalDetails = (PrincipalDetails) authResult.getPrincipal();


    String jwt = JWT.create()
            .withSubject("tokenTest")
            .withExpiresAt(new Date(System.currentTimeMillis()+(60000*10)))
            .withClaim("id", principalDetails.getUser().getId())
            .withClaim("username", principalDetails.getUser().getUsername())
            .sign(Algorithm.HMAC512("secretKey"));

    response.addHeader("Authorization","Bearer "+jwt);

    System.out.println("response 헤더 확인 : "+response.getHeaders("Authorization"));


    super.successfulAuthentication(request, response, chain, authResult);
}'프로젝트 > SpringSecurity' 카테고리의 다른 글
| [Spring Security] 17. JWT 받아서 유효성 검사하기 (0) | 2023.07.20 |
|---|---|
| [Spring Security] 15. JWT를 이용하기 위해 강제로그인 (1) | 2023.07.19 |
| [Spring Security] 14. JWT를 이용해 로그인전 회원가입 및 db관련 수정사항 (0) | 2023.07.18 |
| [Spring Security] 13. JWT를 이용해 로그인 테스트하기 (0) | 2023.07.17 |
| [Spring Security] 12. JWT를 이용하기위한 임시토큰만들어 테스트해보기 (0) | 2023.07.12 |


댓글